
Where are the settings?
The settings can be reached from any page with an options menu, as well as during play:
- Launch pages -> the start page for the Challenge Trail, the overview page for Puzzle Packs and the launch page for the Puzzle Generator preview all feature an options menu. To bring up the options menu, tap the symbol with three dots that is located top-right of display. Then select Settings.
- During play -> tap the symbol for the settings located in the top-right corner of the display. You don't need to worry about the time ticking away, the timer is automatically suspended while the settings are showing.
- After completing a puzzle -> the page showing the points scored also has an options menu located top-right of display.
How can the sound be turned off?
The sound level can be adjusted, or turned off completely, in any of the following places:
- from the main menu page: tap the speaker symbol (bottom-left)
- in the settings (see above) under the section for Optional Features
- in the Sumaddle app settings on the device (go to Settings > Sumaddle).
Can Game Center be turned off?
The short answer is yes, but you might not need to bother.
When the app is started, it tries to connect to Game Center. This is so that you can view and participate in the leaderboards.
More information about the leaderboards can be found in the separate FAQ section on Leaderboards.
When the app is started, it tries to connect to Game Center. This is so that you can view and participate in the leaderboards.
- If you are not already signed in to Game Center, you may be prompted to sign in. This will probably only happen for the first few times that the app is started. It will stop happening after a while, if you cancel the sign-in on every occasion.
- If you are not interested in participating in the leaderboards and have no intention of signing in to Game Center, you can disable the connection to Game Center in the Sumaddle app settings.
More information about the leaderboards can be found in the separate FAQ section on Leaderboards.
Can the text size be changed?
The size of the numbers in a puzzle can be adjusted in the section "Layout & Appearance" of the settings.
For all other text, the size depends on the text size that is configured in the device settings. If you would like to use a custom setting for the Sumaddle app, you can configure this as a "Per-App" accessibility setting:
For all other text, the size depends on the text size that is configured in the device settings. If you would like to use a custom setting for the Sumaddle app, you can configure this as a "Per-App" accessibility setting:
- go to the device settings and select Accessibility
- scroll to the bottom and select Per-App Settings
- add Sumaddle as app
- tap on the app entry
- select Larger Text and set the size you would like to use.
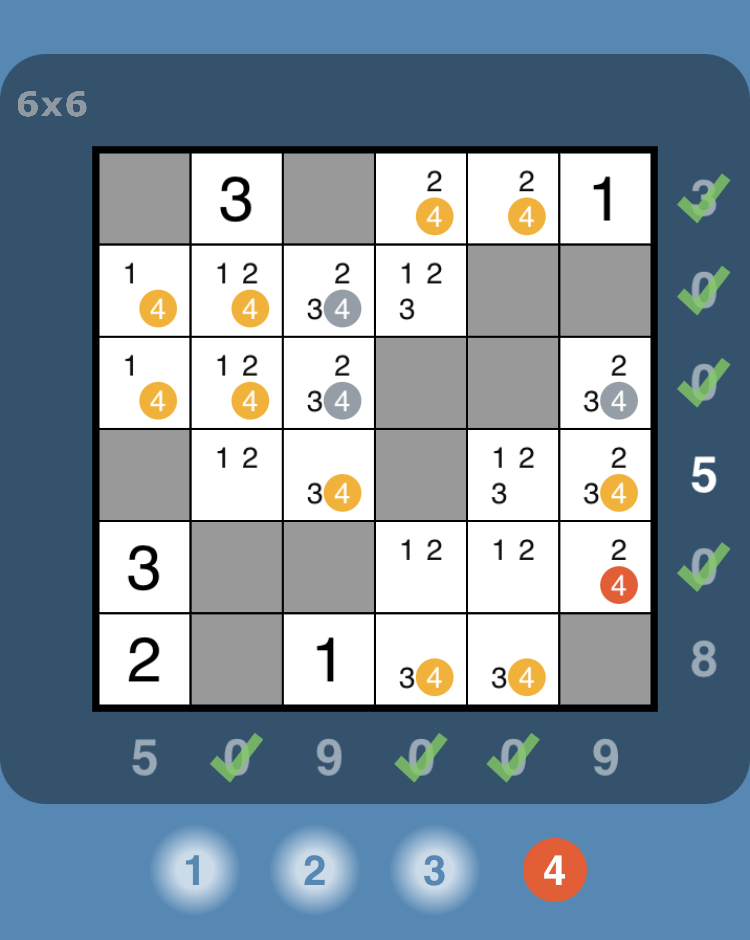
What does the setting "show if numbers add up correctly to the clue values" actually show?
This setting provides visual feedback on whether the values between the blocks add up correctly to the corresponding clue value (shown at the end of the row or base of the column). It helps players to focus on the clues that are still useful and gives an early warning of mistakes.
The screenshot below illustrates how the feedback works:
The screenshot below illustrates how the feedback works:
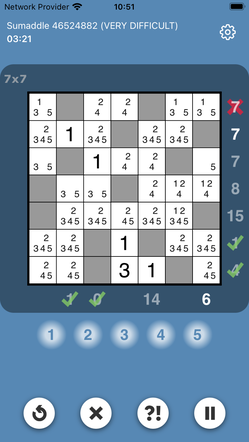
- Green check marks (ticks) are shown where the values between the blocks add up to the clue value correctly, such as in the last row where 3+1 = 4.
- A clue is marked with a red cross if the values between the blocks do not add up to the clue value correctly, or if an invalid combination of candidate numbers is detected. This is illustrated in the first row (with a clue of 7), because the candidate numbers 2+4 only add up to 6, not 7. It is always best to fix mistakes as soon as they happen.
- A clue is shown dimmed if the candidate numbers between the blocks form a valid combination, as long as these numbers have also been eliminated from the other squares outside the blocks. There is an answer below that explains the easiest way to set a combination in this way. The clue is dimmed because it is no longer needed, that is, it has served its purpose and is no longer useful for solving the puzzle.
- The clues that are still shown with normal brightness indicate where the candidate numbers have not yet been narrowed down to a single combination. This is often a good place to look when you get stuck. In the example above, the row with a clue of 7 and the column with a clue of 6 are both shown with normal brightness. There is certainly something that can be done in the case of the column with clue of 6 - the only combination that fits is 1+5.
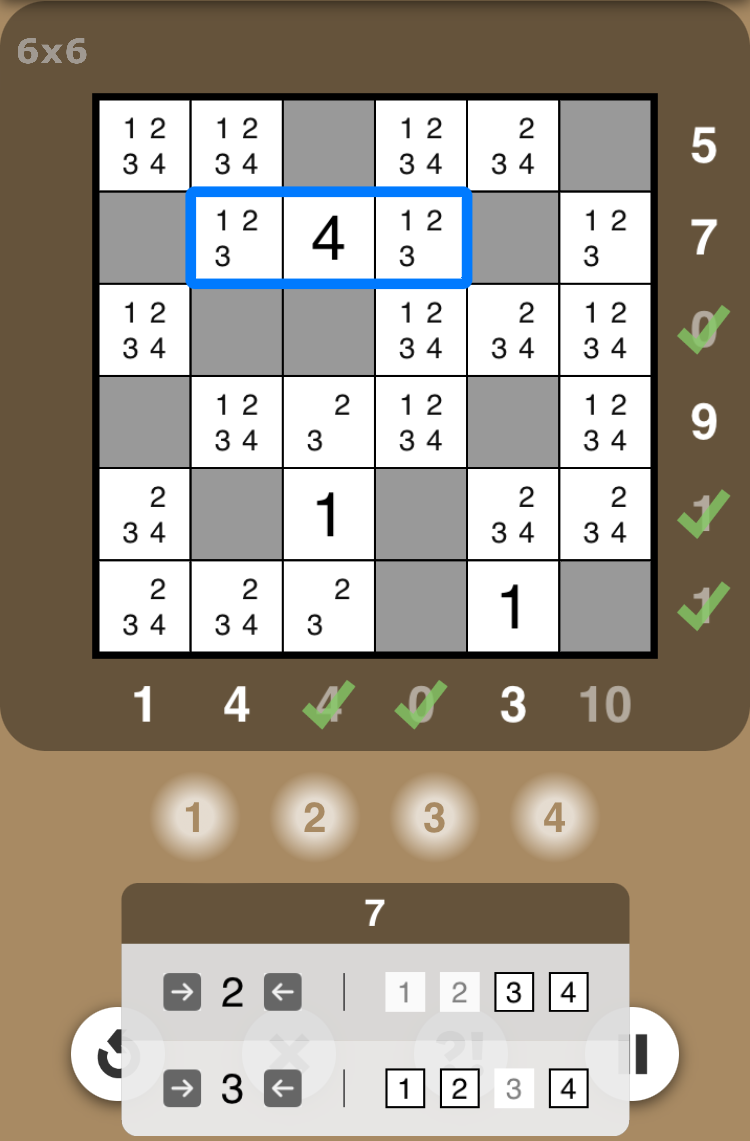
What does the setting "only show combinations with the right number of values" actually do?
This setting makes it easier to see which combinations are still valid for consideration. It is especially useful for large puzzles where the clue values can often be formed using a lot of different combinations.
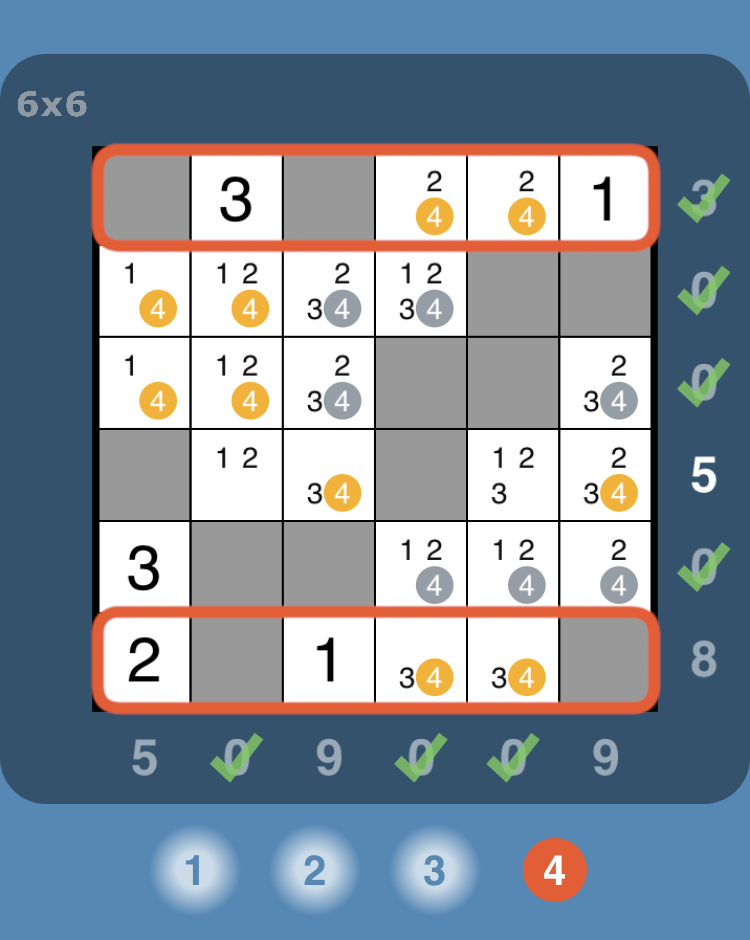
The setting is best illustrated with an example. The 6x6 puzzle shown below has been partially completed and the row with clue of 7 has been selected.
The setting is best illustrated with an example. The 6x6 puzzle shown below has been partially completed and the row with clue of 7 has been selected.
|
Two combinations are shown:
However, the blocks have already been placed in this row and there are three squares between the blocks. This means, the combination with 2 values is no longer relevant, so it is just a distraction. |
|
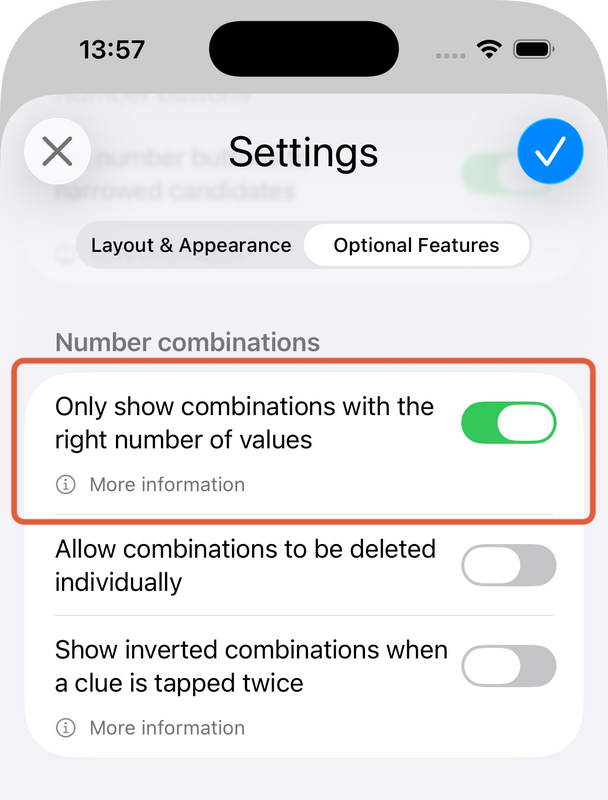
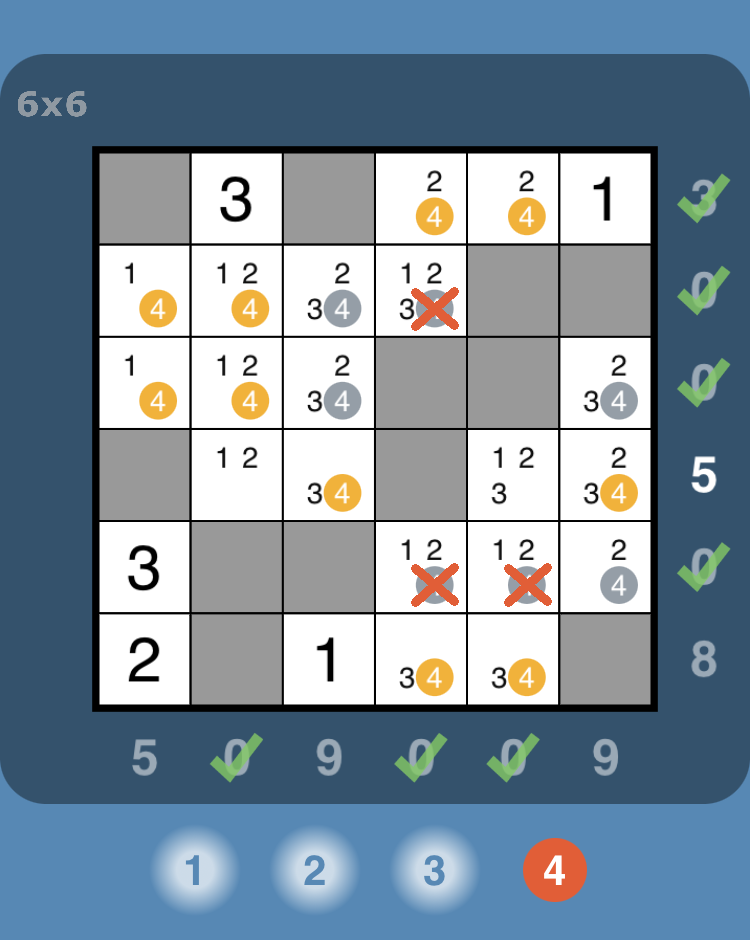
Let's turn on the setting:
|
|
|
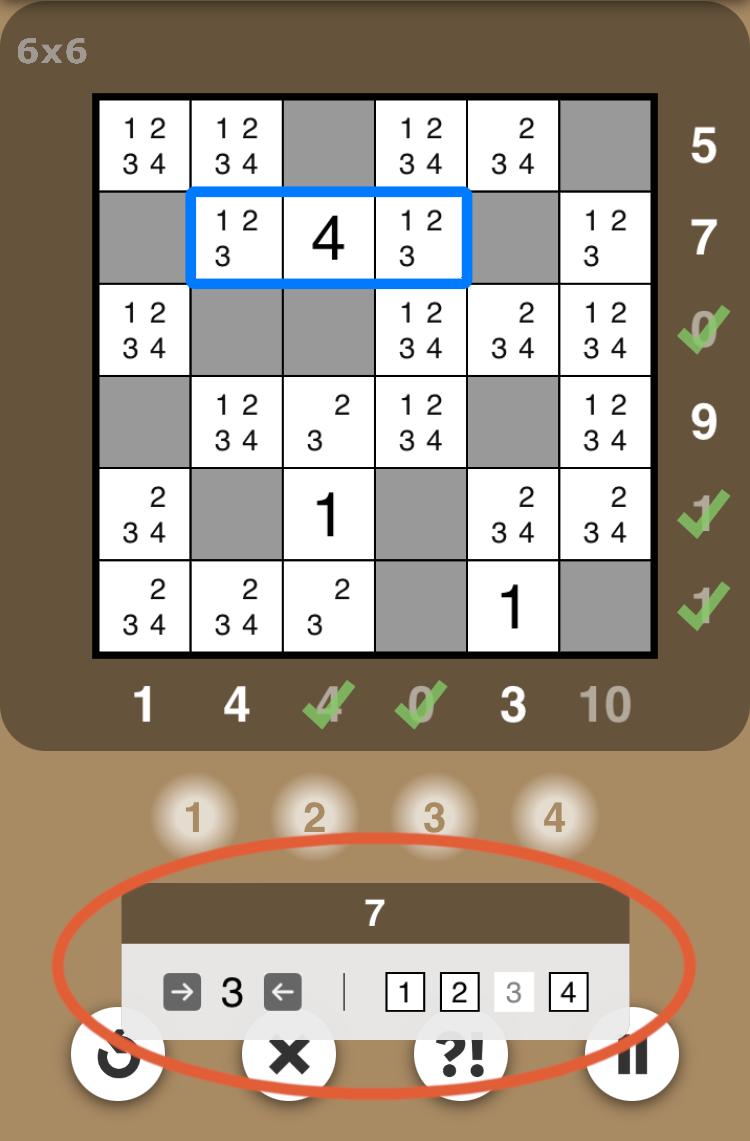
Only one combination is now displayed - the one with 3 values. Combinations with the wrong number of values are no longer shown.
|
Why might it be useful to see paired values highlighted by the spotlight feature?
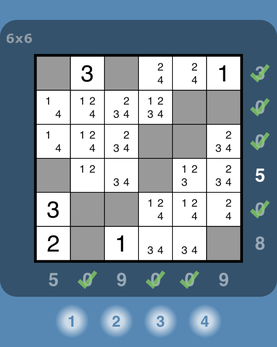
Different modes of highlighting for the spotlight feature were added in app version 1.51.0. To see how the mode "singles and paired" can be useful for solving a puzzle, let's examine an example case.
|
The puzzle shown here was generated by the puzzle generator in play mode Expert. It has been partially solved, but now we're stuck.
|
|
|
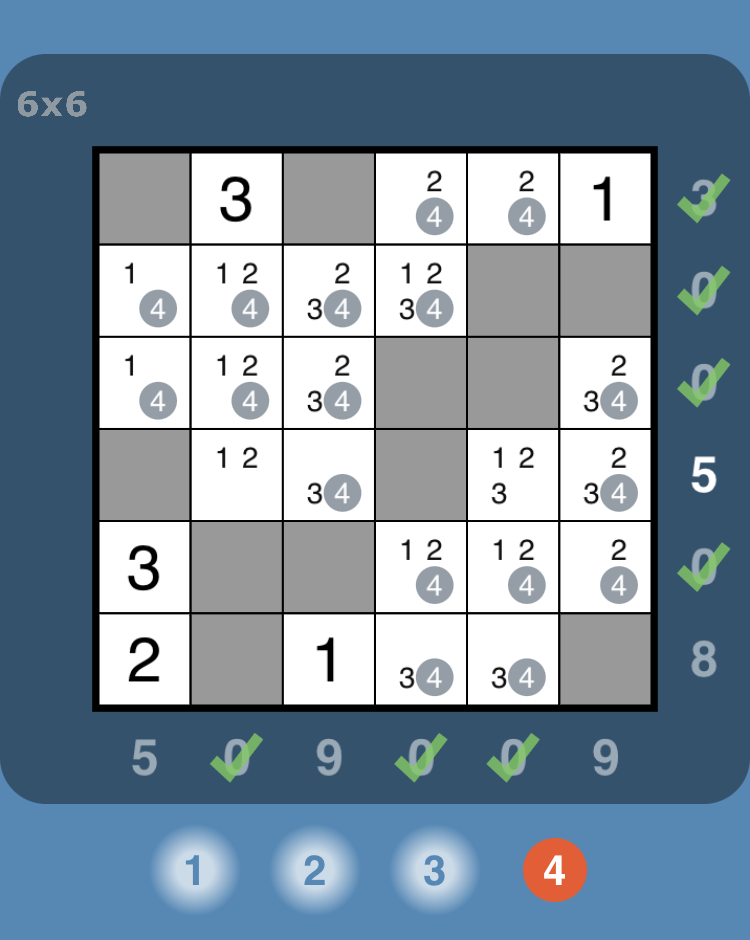
With spotlight mode set to "singles", we try looking for values that only appear once in a row or column. Unfortunately, there aren't any.
|
|
|
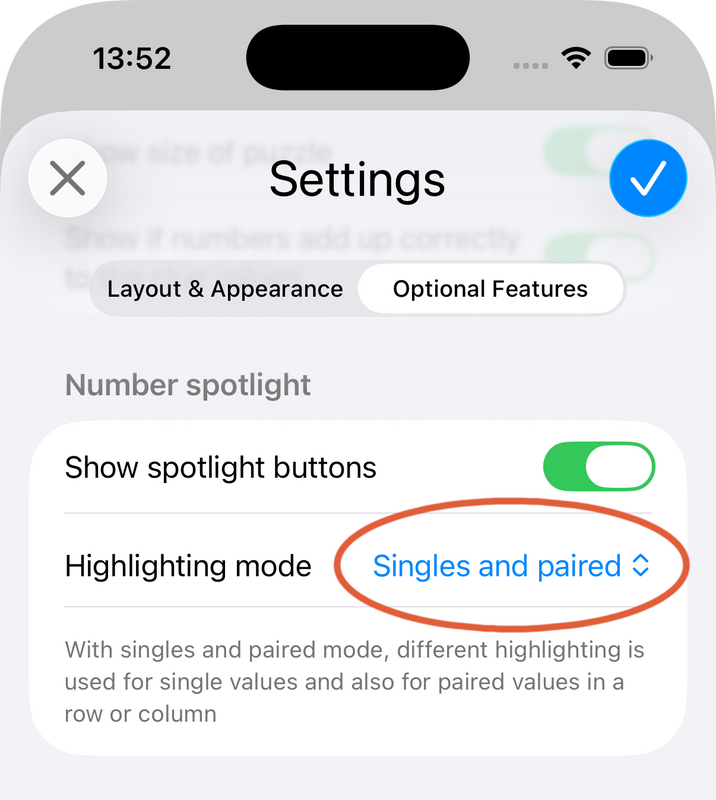
Let's change the highlighting mode to "singles and paired" and try using the spotlight again:
|
|
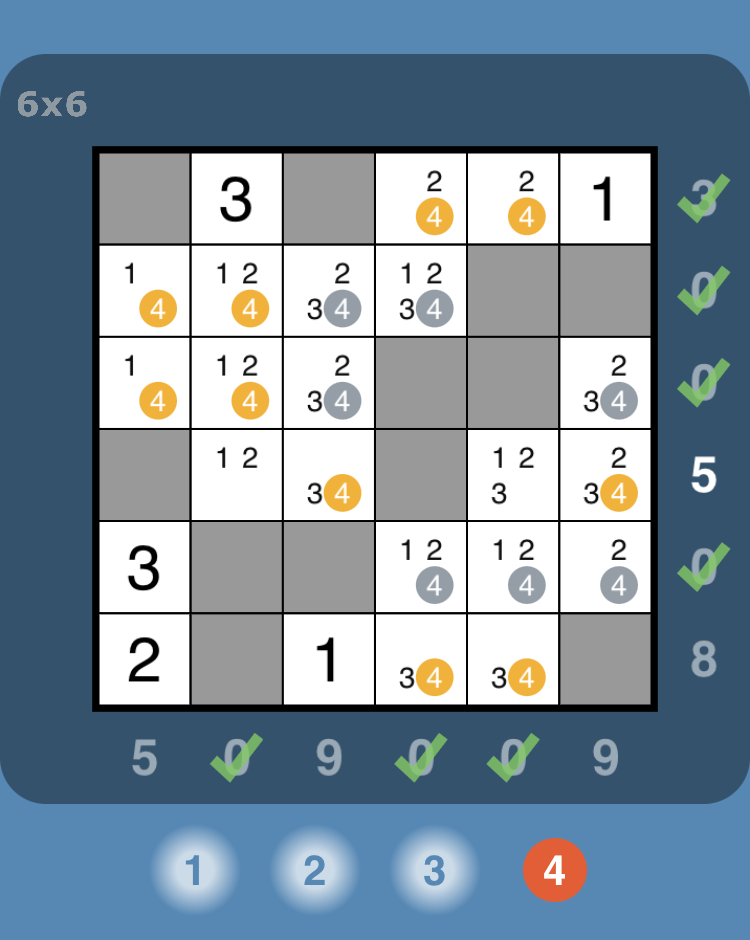
With the highlighting mode set to "singles and paired", values that appear exactly twice in either a row or column are highlighted with yellow. We see that there are a number of pairs highlighted in this way.
Where it gets useful, is when two pairs are aligned (either in the rows, or in the columns). There are actually two cases of aligned pairs in this example:
Where it gets useful, is when two pairs are aligned (either in the rows, or in the columns). There are actually two cases of aligned pairs in this example:
- the pair in the first row is aligned with the pair in the last row;
- the pair in the first column is aligned with the pair in the second column.
|
Taking the case of the aligned pairs in the first and last rows:
|
|
There are three squares where a 4 can be eliminated in this way.
|
|
With the eliminations done, we apply spotlighting once again. It now shows that there is a single value of 4 that can be set in the square at the end of the second-last row.
This allows progress to be made. This puzzle is now cracked and the solution falls into place quite quickly! |